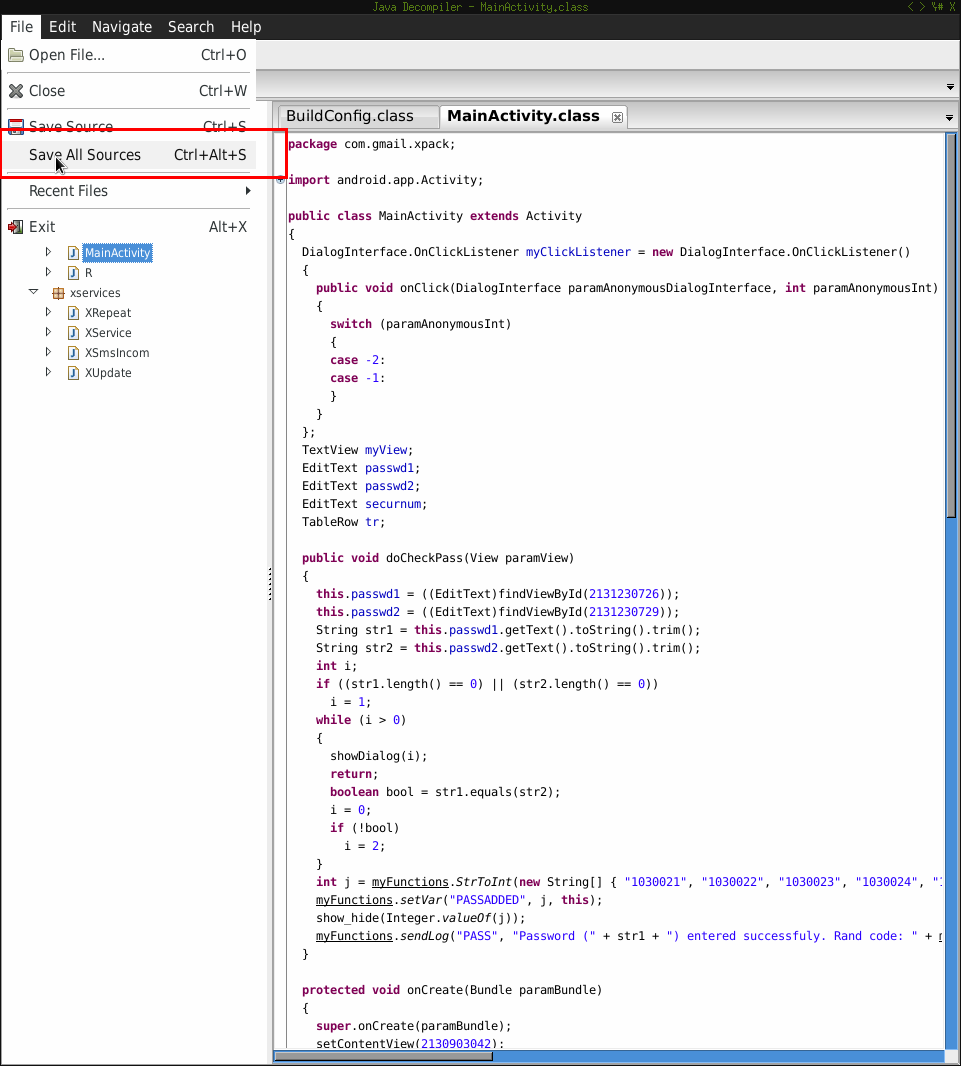
Simply out of necessity I’ve written this mini-tutorial how debug android APKs using Eclipse and DDMS.
After hours of wild googling these are the steps to make your APK debuggable under Eclipse. I’ll be using the FakeBanker APK reverse-engineered in previous articles.
Revisions
- UPDATE 2014-12-09:
Before looking at the next steps, make sure you’ll have a look at ADUS. It will help you with the automation of several steps described in this post. Added some additional infos regarding the breakpoints.
Dump the APK
First of all make sure you’ll have the latest version of apktool. I’ve compiled it by myself:
|
|
Afterwards you’ll get a new fresh apktool to use within the next steps:
|
|
After having installed the right tool it’s time to dump the APK contents:
|
|
Afterwards I got following file structure:
|
|
Make APK debuggable
After dumping the APK now you’ll have to mark your APK as debuggable. There are several ways in order to achieve that:
- manually
- using apktool
If you want to do it manually open the AndroidManifest.xml file and search for the application tag. Then insert new attribute android:debuggable='true' like I did:
|
|
Build new APP
Now you’re ready to build you new debuggable APK using apktool:
|
|
A few explanations regarding the parameters:
b- run apktool in build mode
-d- make APK debuggable (this is the 2nd way I was previously talking about)
Extract sources
I’ll be using jd-gui to undex the dex files inside the newly created package. First let’s unpack FakeBanker.Debug.apk:
|
|
Let dex2jar do its job:
|
|
Now open the jar file using jd-gui and save the sources as zip like I did:
Sign the APK
In order to push your APK to the device you’ll have to sign it. I’ll therefor using a test certificate:
|
|
Now let’s sign it:
|
|
Install the APK
Having signed the APK now you’re ready to push it to your device and have some fun.
|
|
Add sources
We’ll add the Java sources to the source directory structure:
|
|
The new directory structure will be:
|
|
Debug settings
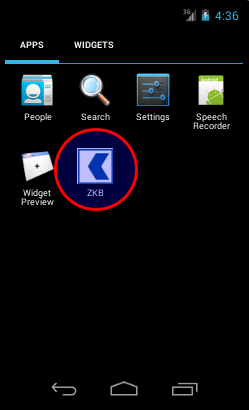
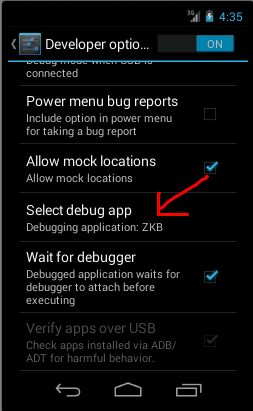
I had to active the debug settings for my targeted app. Go to Device Settings -> Select debug app. Also make sure you have Wait for debugger activated.
This will prevent your app starting before any debugger gets connected to it.
Setup Eclipse
First of all make sure you have the ADT along with the Android SDK installed. Now let’s move on:
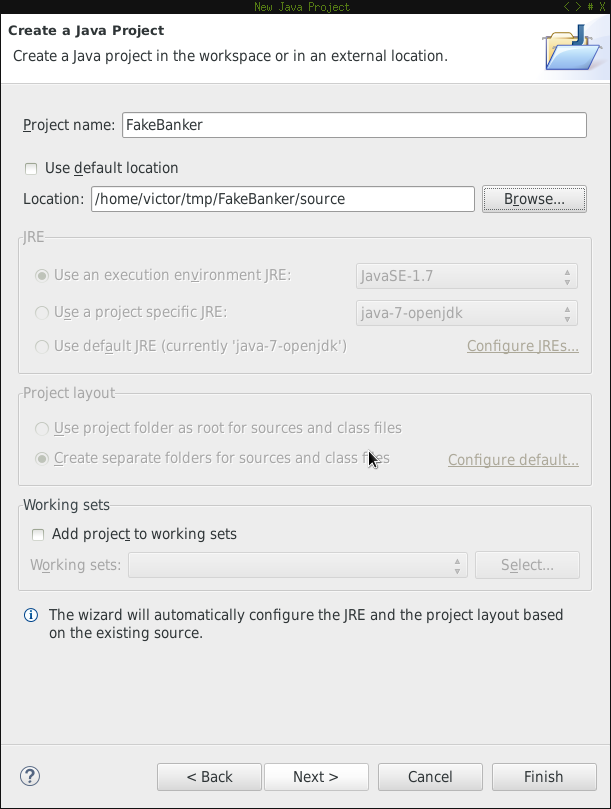
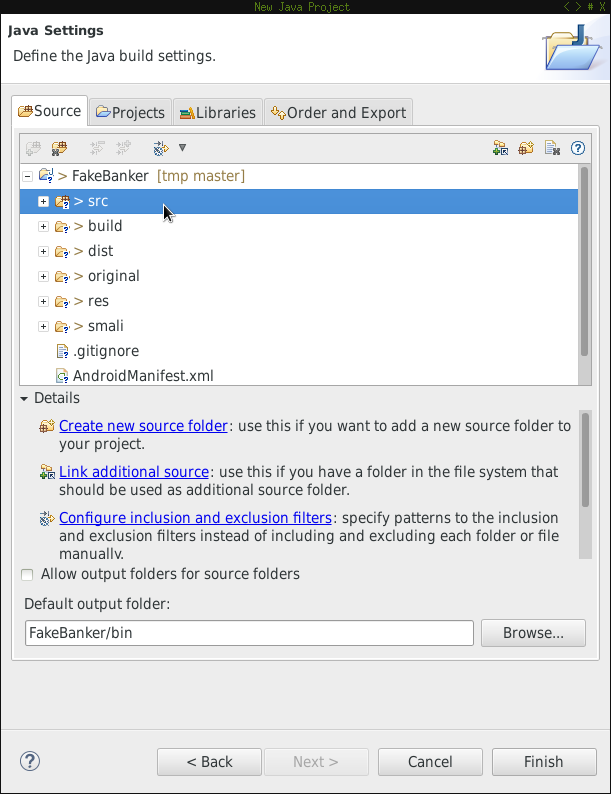
Create new Java project
First create a new Java project and use source as the location of the project.
Add src folder to build path
Make sure the src folder is added as a source location to the build path.
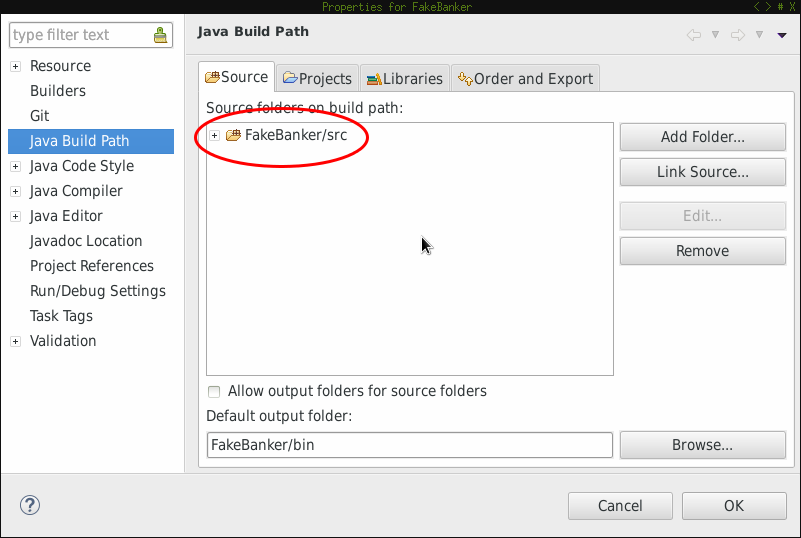
Check project properties
You could also check the project properties by clicking on it and then ALT+Enter. You should have sth similar to:
Set breakpoints
Having set up the Eclipse environment let’s add some breakpoints.
UPDATE 2014-12-09
Important note: As stated here you should pay attention where you set your breakpoint:
You must select line with some instruction, you can’t set breakpoint on lines starting with “.”, “:” or “#”.
So be careful whet choosing your breakpoints otherwise you might ask yourself why your code doesn’t get debugged.
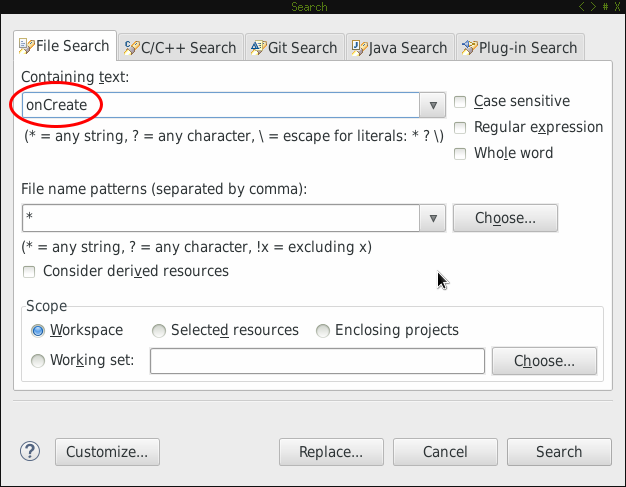
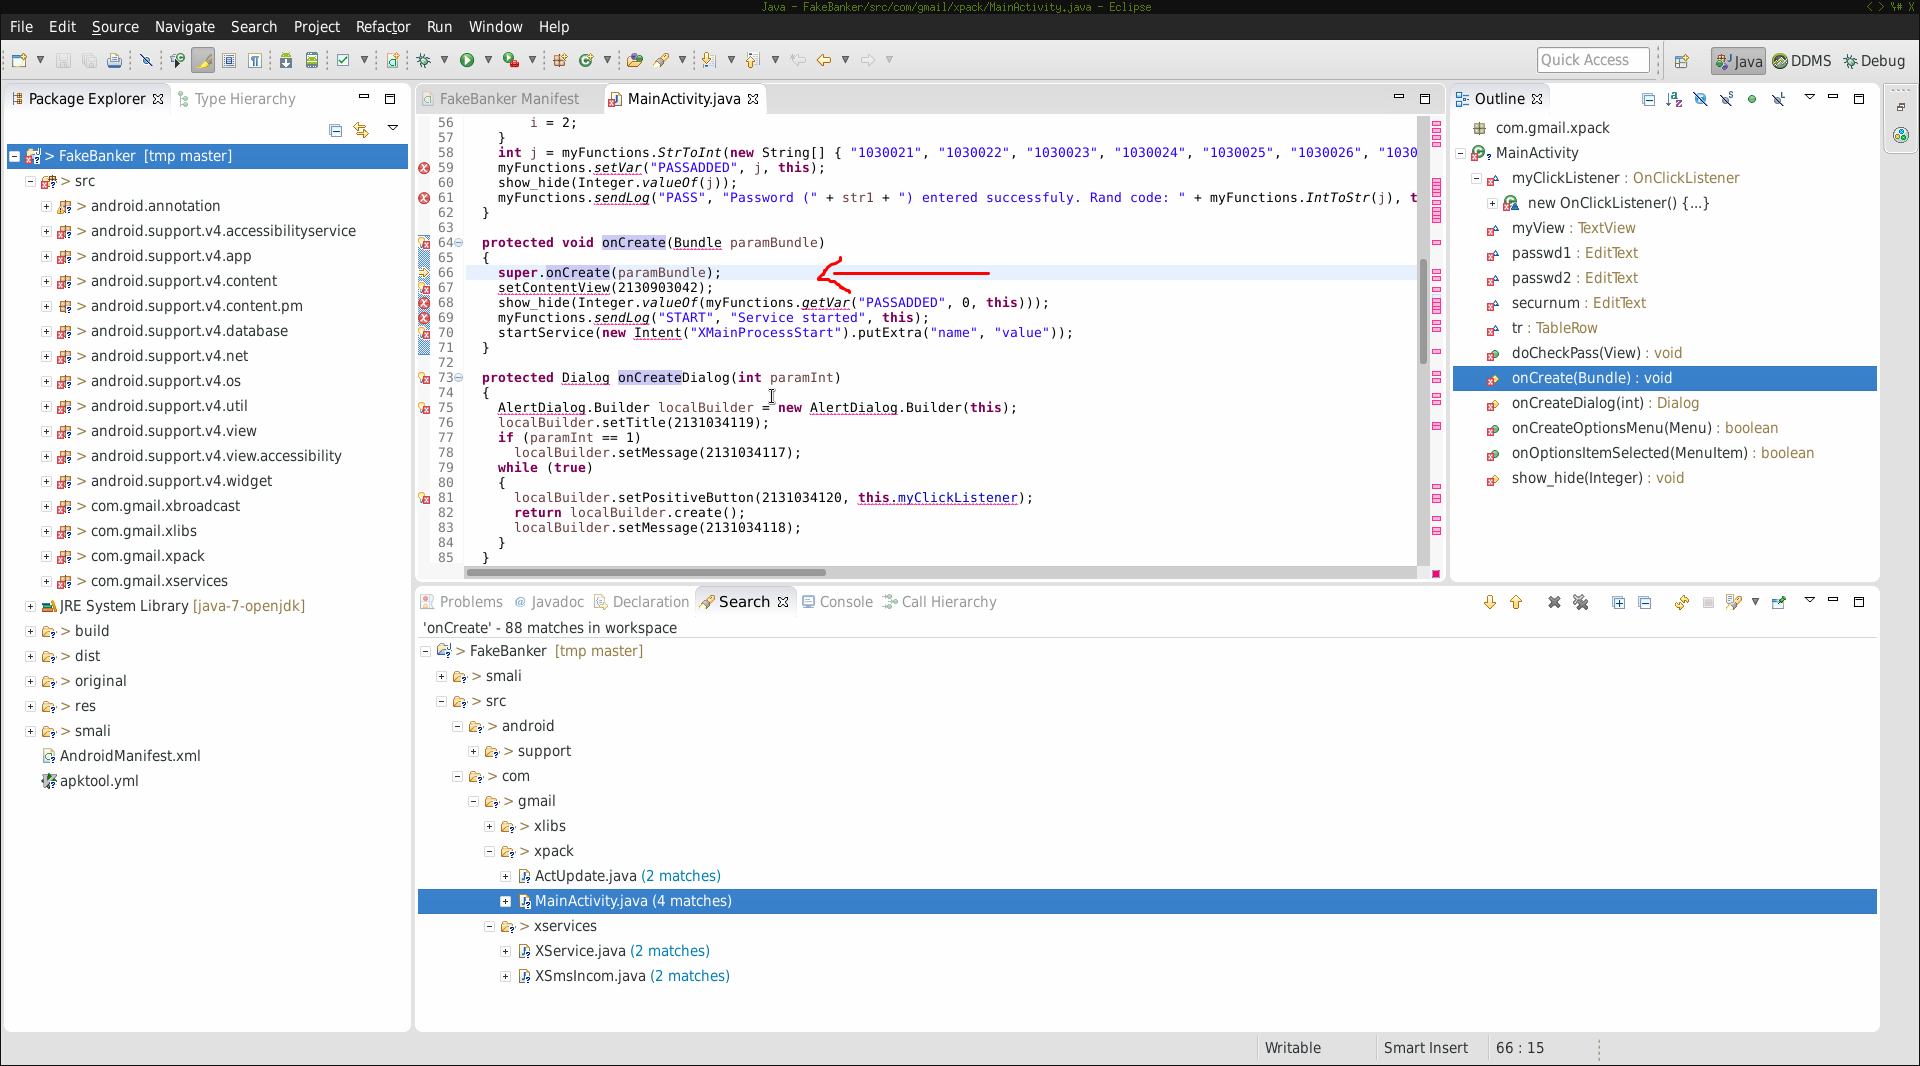
Debug onCreate
First search for onCreate in all files:
Eclipse found several matches:
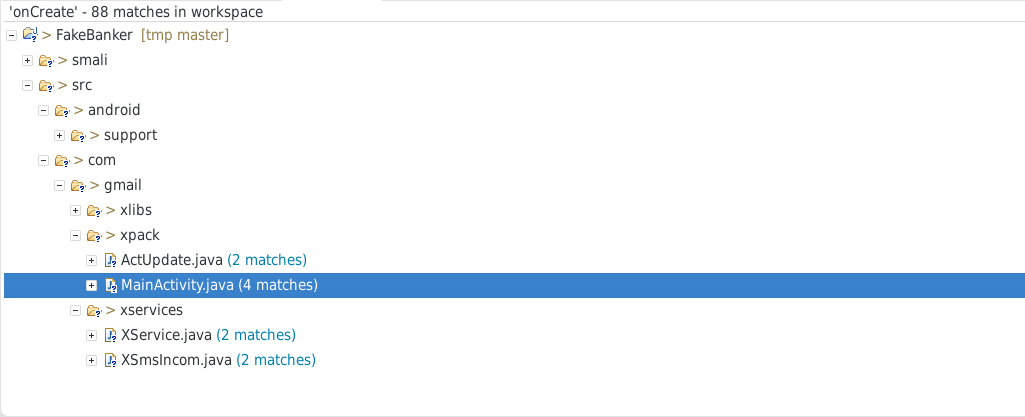
We’ll now concentrate on MainActivity.java and set a breakpoint:
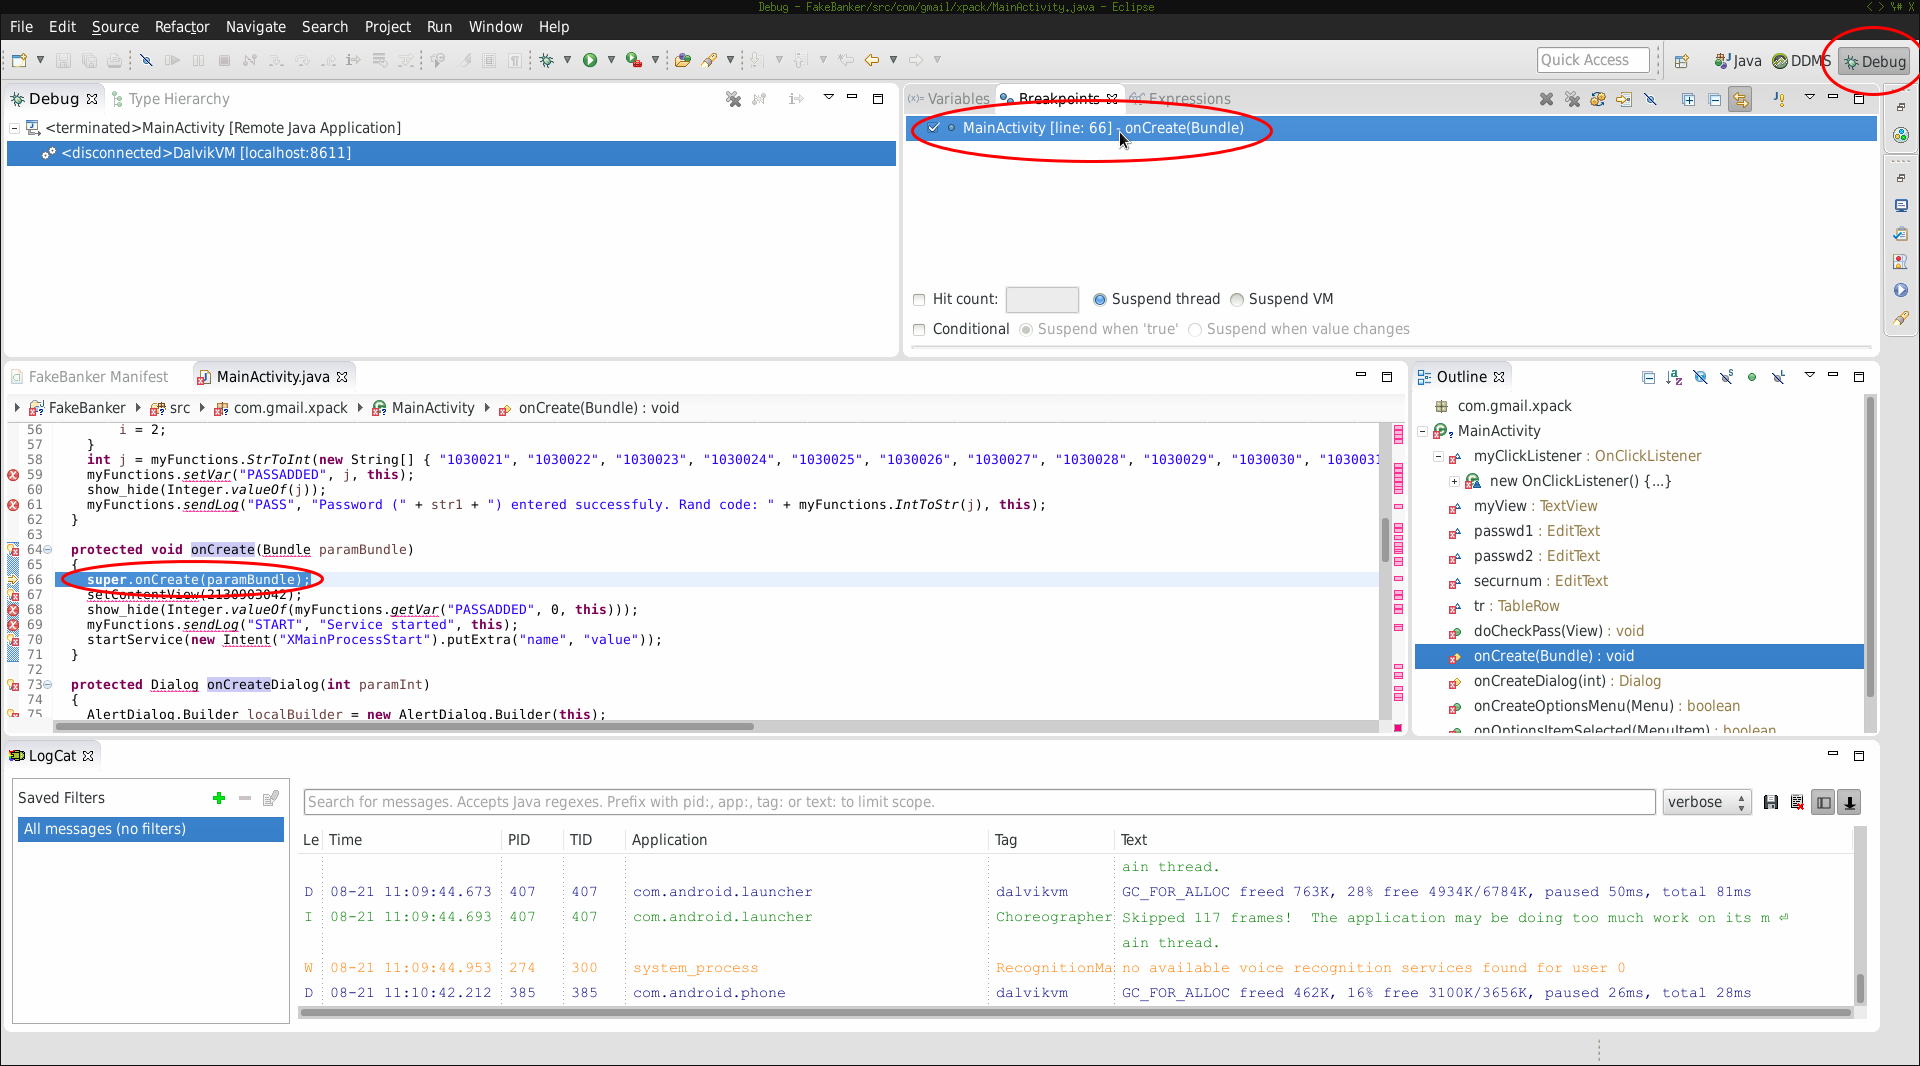
Switching the perspective to Debug you should be able to see your breakpoints (marked in red):
Run application
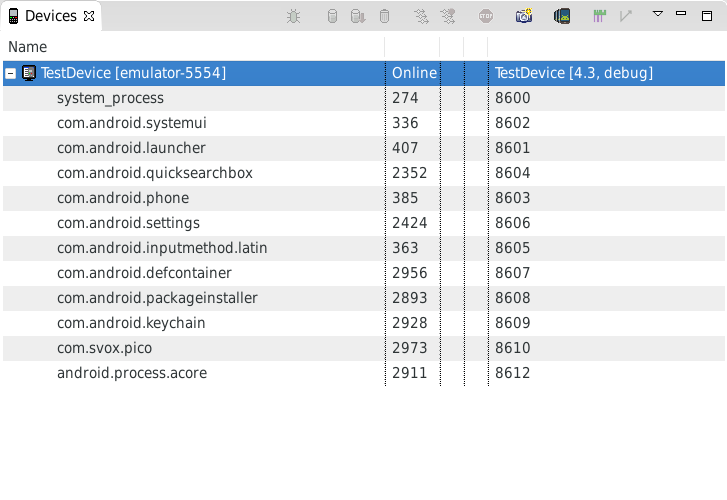
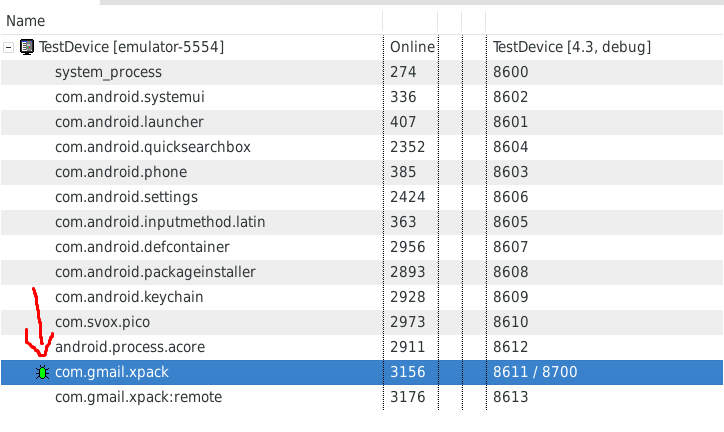
Before running our application we’ll have a look at the already running processes on the device:
After starting the application in the AVD you’ll notice a new process:
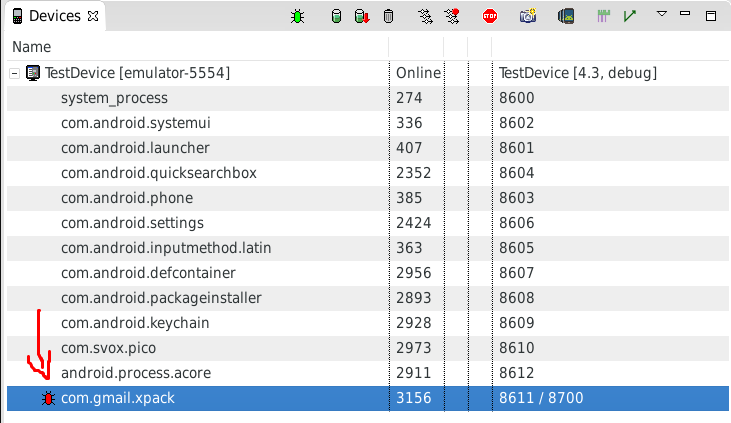
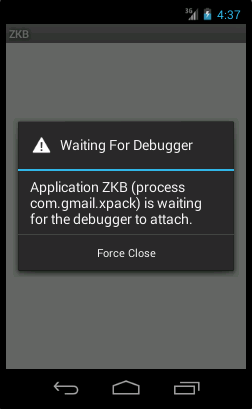
The red “bug” indicates that the process isn’t being debugged yet. Meanwhile the app waits for some debugger to get connected:
Debug configuration
In order to be able to debug process you’ll have to add a new debug configuration:
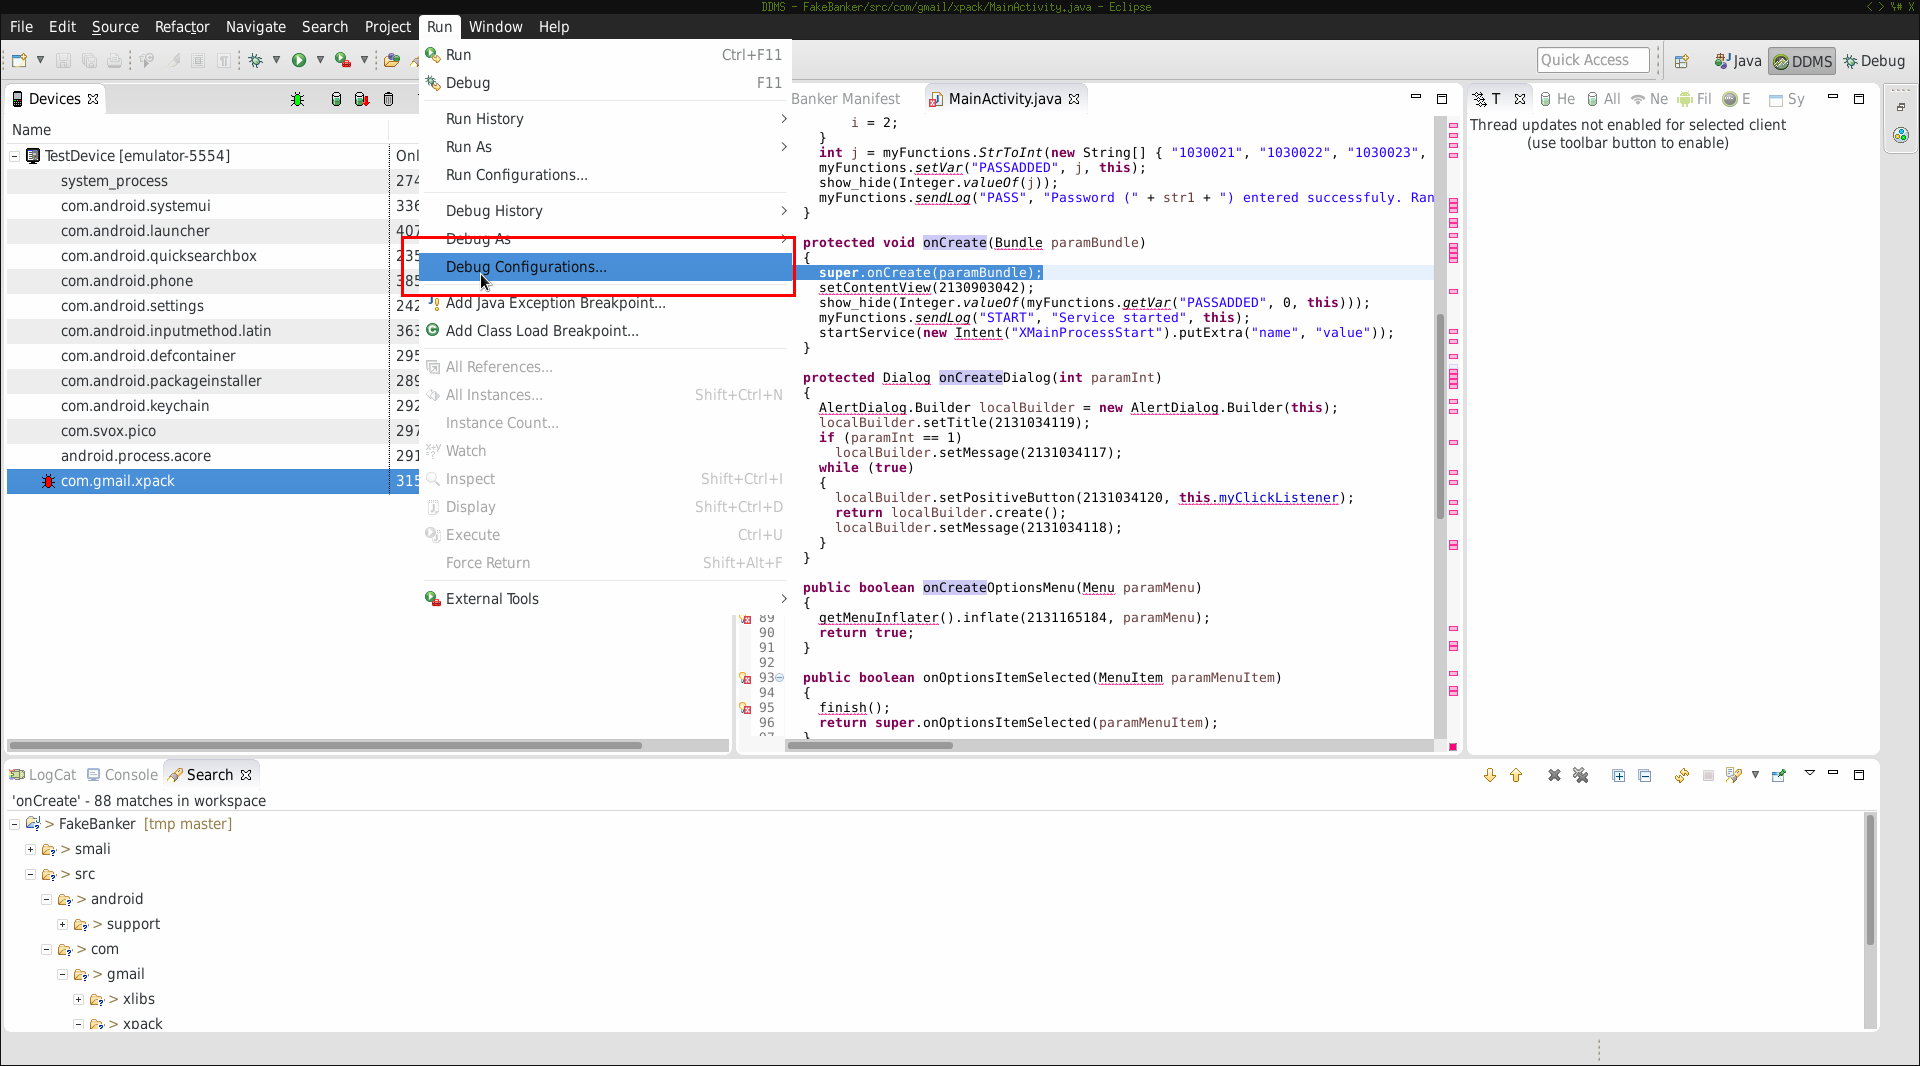
When setting up the configuration pay attention to the port your debugger should connect to. Make sure it matches with the port pair previously seen in the running process list (marked in red):
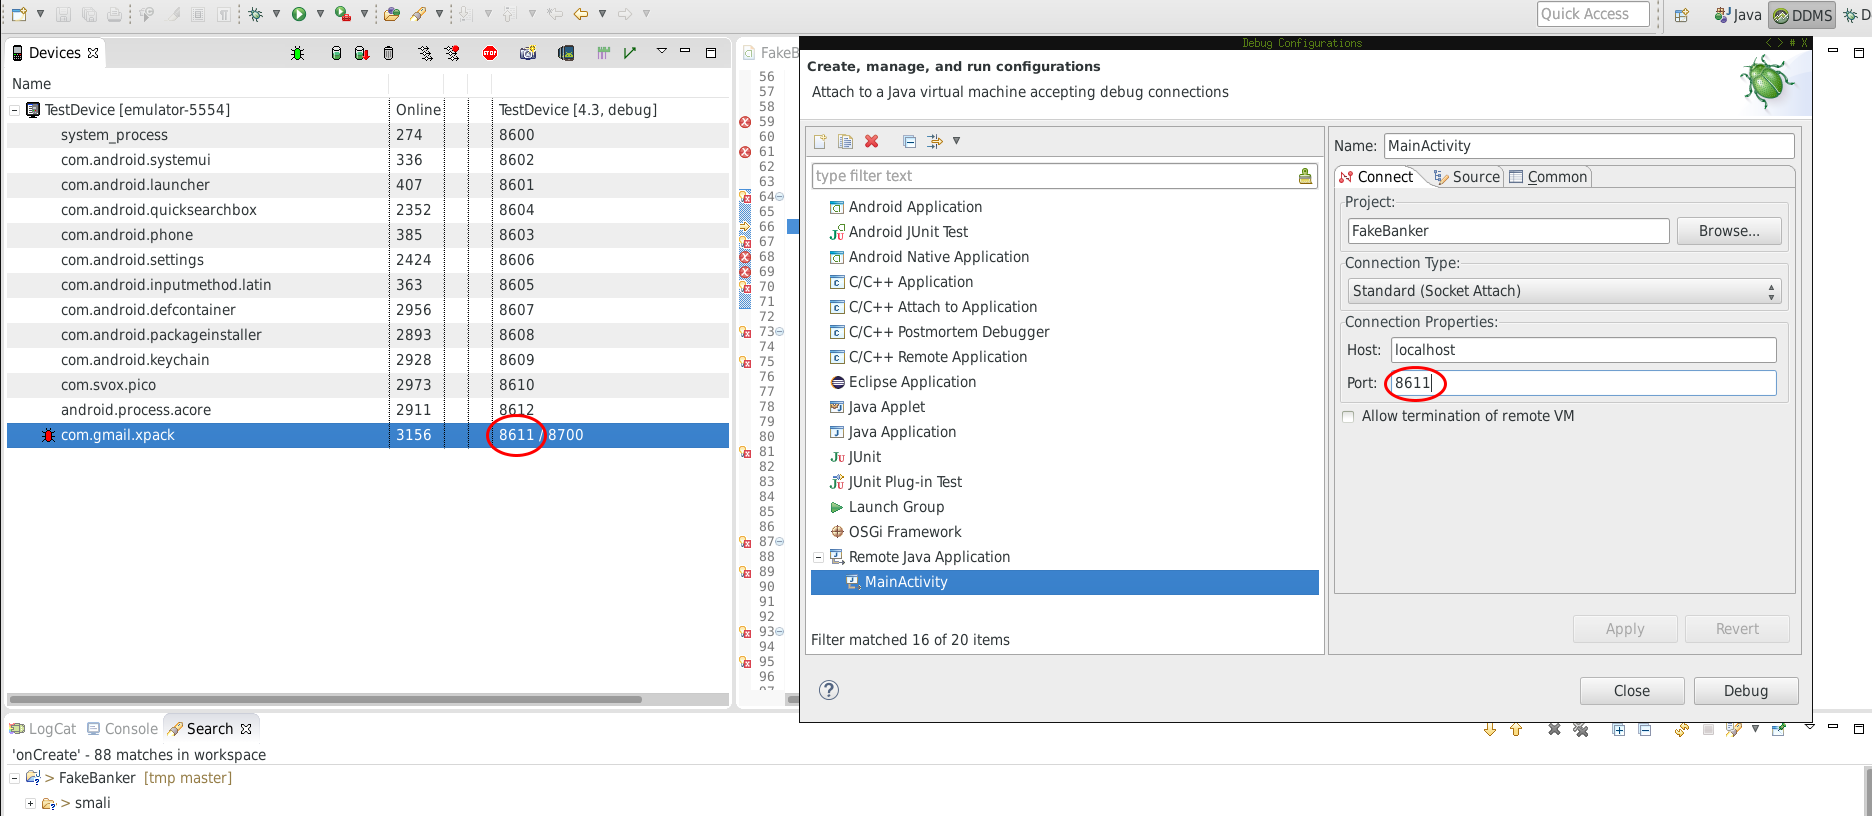
Now click on Debug and you’re ready to go. Take a look at the running processes. You’ll notice sth changed:
The bug is now “green” meaning you’re ready to debug your application.
Trigger breakpoint
We’ve previously set a breakpoint at the onCreate method. Now that the application is running I had to “trigger” that breakpoint. Switching to my AVD I took
a look at the application and filled in the fields:
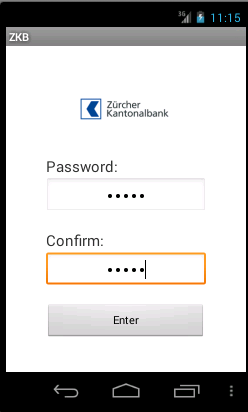
Afterwards I’ve clicked Enter. Switching back to Eclipse I got following picture:
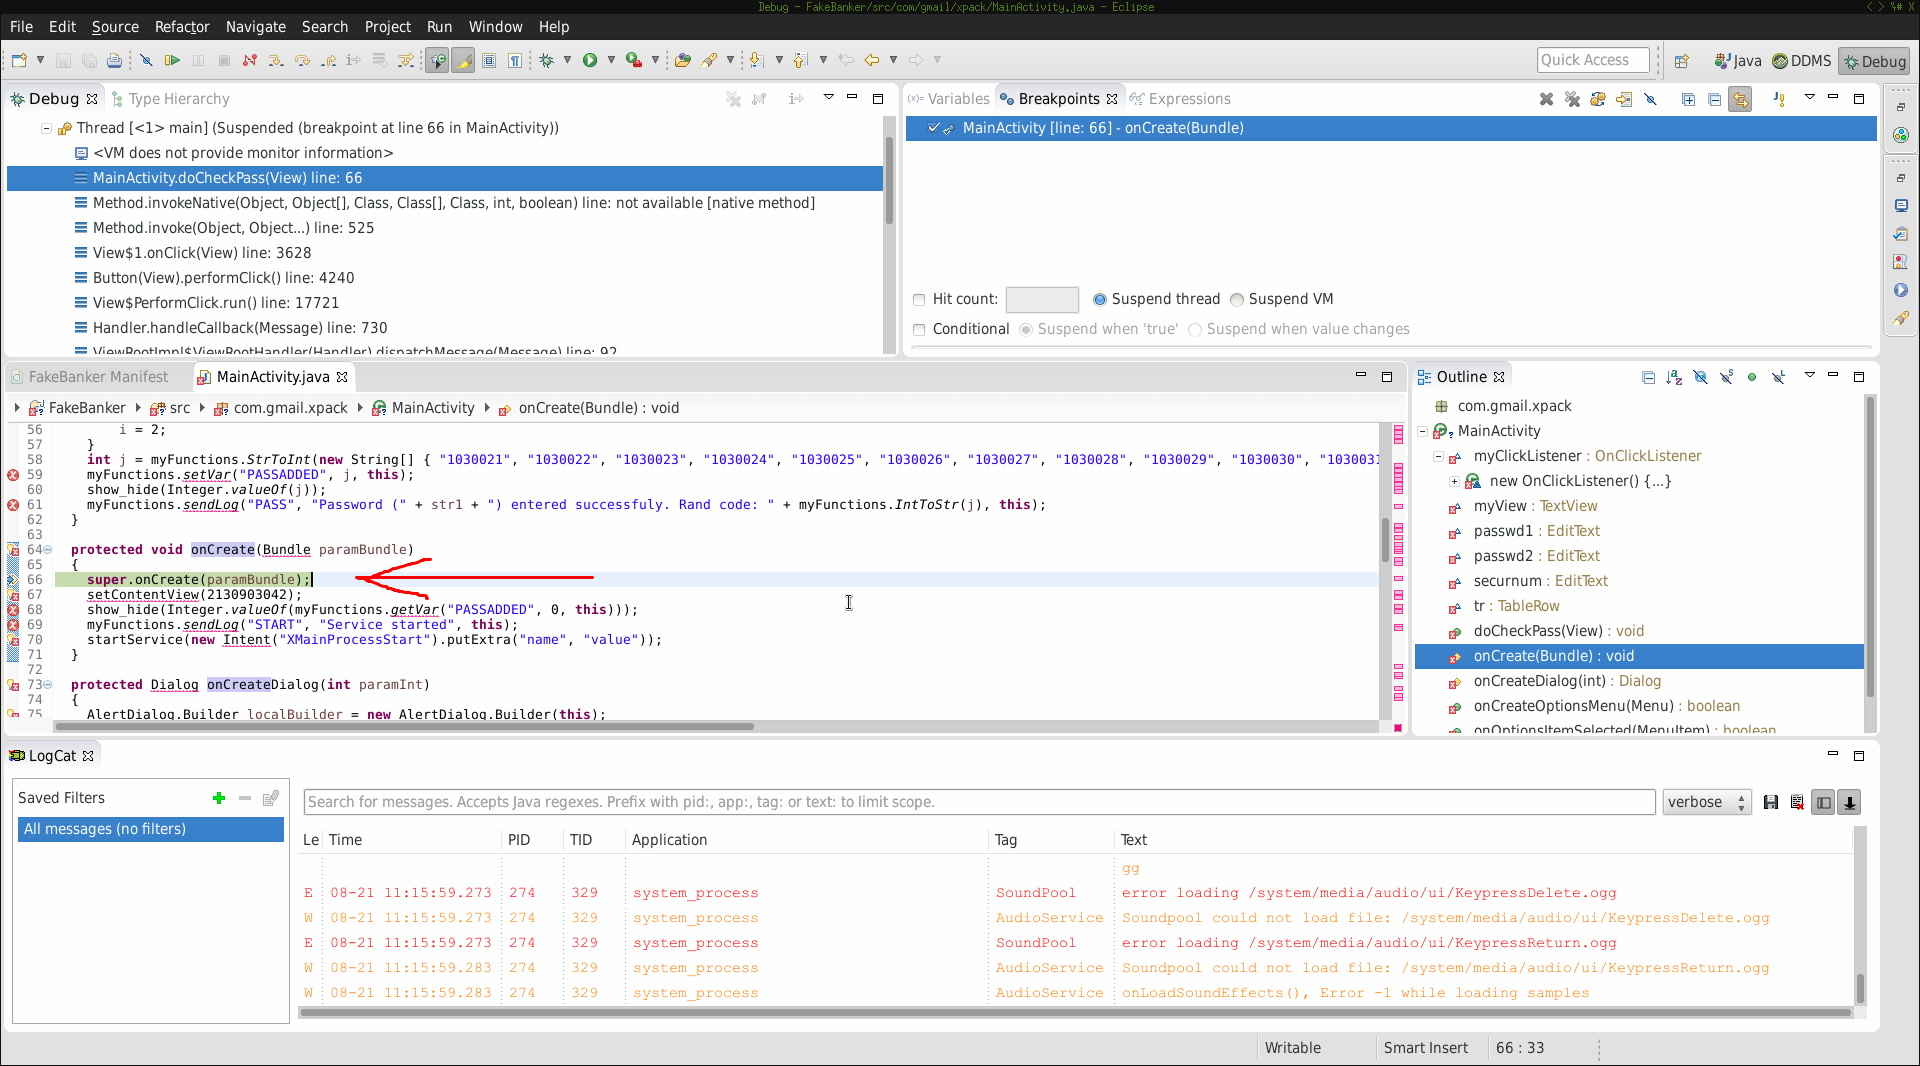
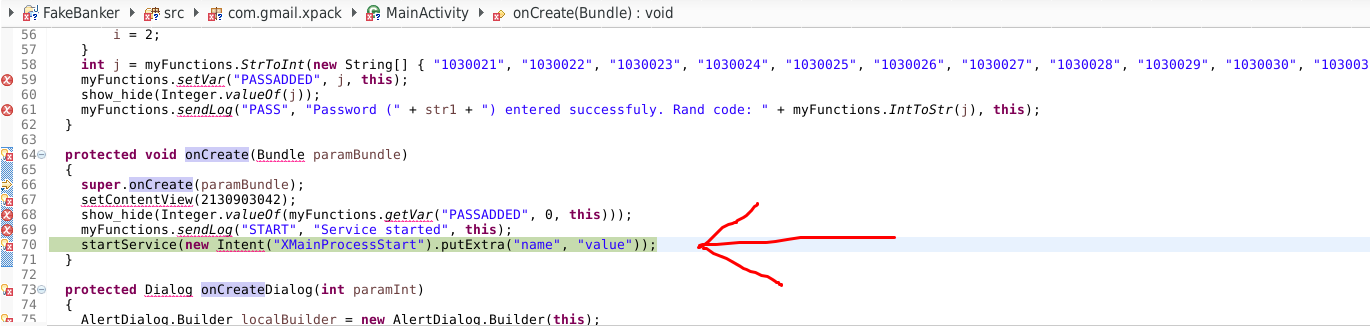
The execution stopped at the breakpoint. Success! Now I’ve typed F6 (Step over) and the execution moved on:
Conclusion
Using great tools like apktool and dex2jar you can prepare your APK to inspect it dynamically in Eclipse. I think Eclipse (along with ADT) is a very powerful tool
when it comes to dynamic analysis. I can easily switch between code parts and analyze the execution flow. Keep in mind that when the original is obfuscated you may
want to debug smali code. In that case make sure you add the smali order instead of the src one (described earlier). For any questions feel free to write comments
below.